Table of Contents:
- How to Print from a Chromebook
- Supervised Users
- Change your Chromebook’s DNS settings
- Chromebook acting up, and you think it might be one of your extensions causing the problem?
- I’m having issues with my Chromebook, but I don’t know if it’s a hardware issue, or a software issue
- How do I Hard Reset my Chromebook?
- How do I do a Browser Reset?
- How do I Powerwash my Chromebook?
- How do I USB Restore my Chromebook?
- How do I share files between my Chromebook and my mobile device?
- My Chromebook got a virus!
Supervised Users
What is a Supervised User?
There is a neat feature of Chrome OS that allows you to create what’s called a “Supervised user”. When you create a supervised user, you are able to track the websites that user is visiting, and maintain a blocked/allowed list of websites for that user.
You can either choose to “Allow all of the web” and then pick certain websites to add to the block list; or you can choose to allow “Only approved sites”, and pick certain websites the user is allowed to view.
You can also change the users password, and flip SafeSearch on/off.
As of right now, that’s all you can do with a supervised user. Keep in mind, a supervised user is not able to add Chrome apps/extensions from the Chrome Web Store. All they can do, is browse the web.
How do I create a Supervised User?
Before you create the supervised user, you’ll need to decide exactly which Google account you want to mange the user from.
Note: As of right now, only one account can manage a supervised user at a time. There’s no way to add an additional “admin”. If you’re a parent, you may want to consider creating a new, separate account that you and your spouse both have access to and manage the supervised user from that account. Otherwise only one of you will have access to manage the supervised user.
Once you’ve decided which account to manage the supervised user from, make sure that account is added to your Chromebook. If it’s not, add it.
Go ahead and logout of your Chromebook, so that you’re looking at the sign in screen. You should see all the accounts that you’ve added to this device, as well as a menu at the bottom with options like “shut down”; “browse as guest”; “add user”; and a little 3 dot icon that is the universal “more options” icon.
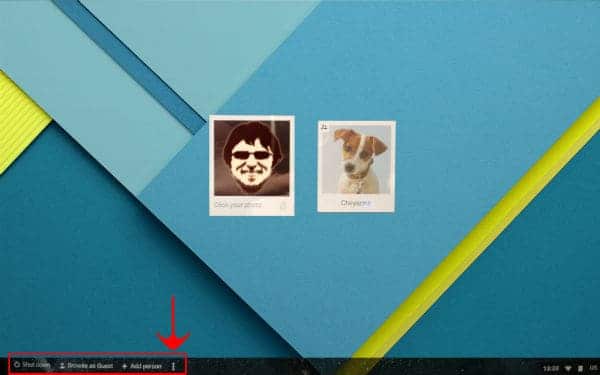
Click on that three dot icon, and select “add supervised user”. You should be presented with this screen:
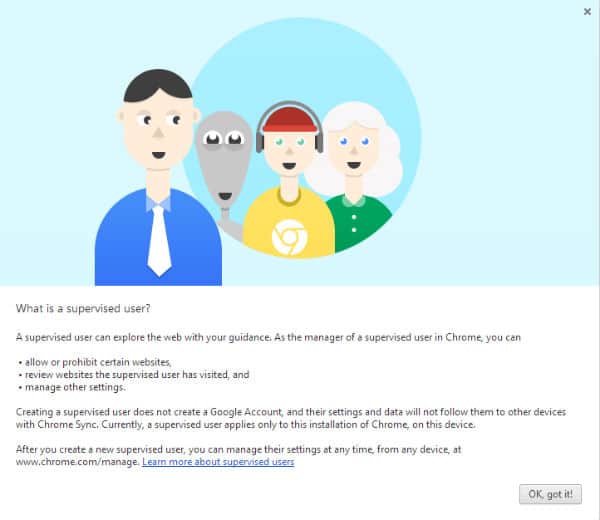
Go ahead and click “OK got it”.
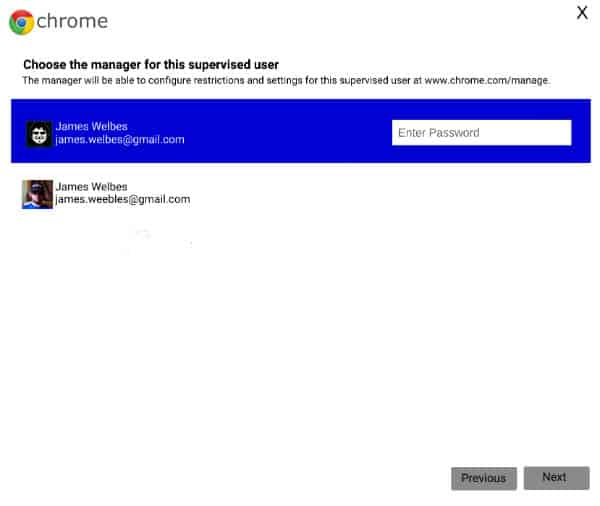
Find the account from which you will be managing the supervised user, enter the password and click next:
Now you can give the supervised user a name, a password, and a profile icon.
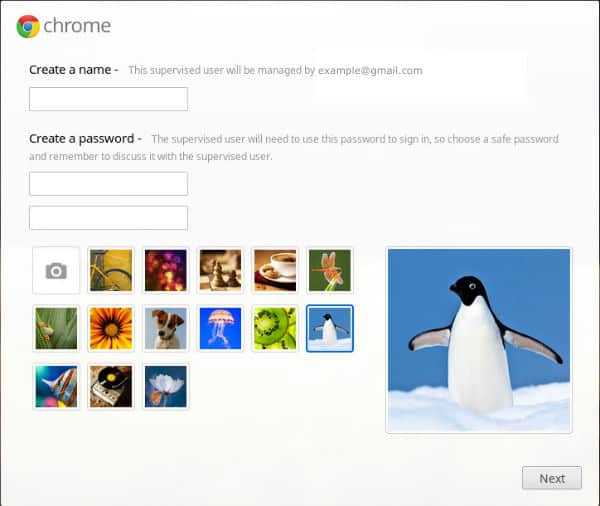
Once you click next, you’ll get the spinning loading icon for awhile. Sometimes, a long while. When I did it, I actually got a little red error message that said something like “this is taking longer than usual”. Just keep waiting. Walk away for a bit. It will finish eventually.
How do I manage a Supervised User?
Once you’ve created your supervised user, you’ll want to know how to do things like view the user’s browser history, how to add websites to the allowed/blocked lists, and how to change the user’s password.
First, you’ll want to make sure you’re logged into the account that has access to the supervised user, then access the Supervised User Dashboard here. (might wanna bookmark that link)
From there, you’ll see a list of all the supervised users that account has access to on the left hand side:
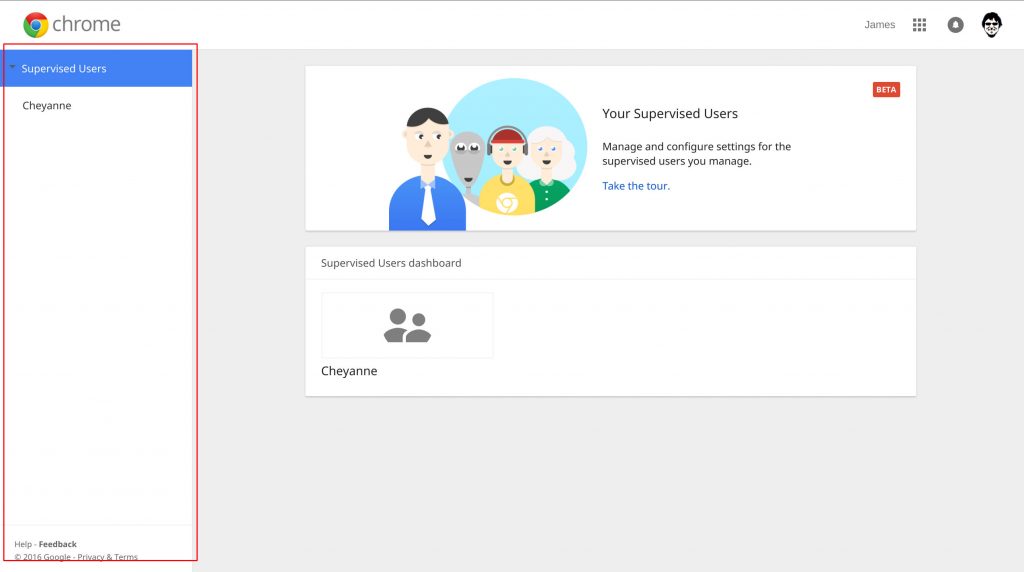
Click on the user you’d like to manage.
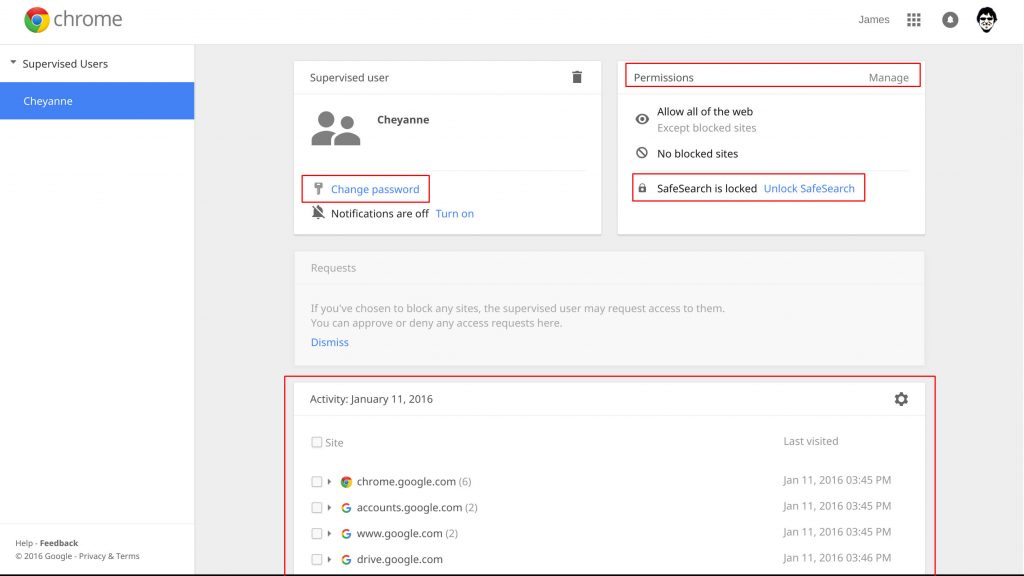
From this screen, you can change the user’s password, view their browsing history, and toggle SafeSearch on/off.
If your supervised user requests access to a site that you’ve blocked, you’ll see those requests in the middle, where you can approve or deny them.
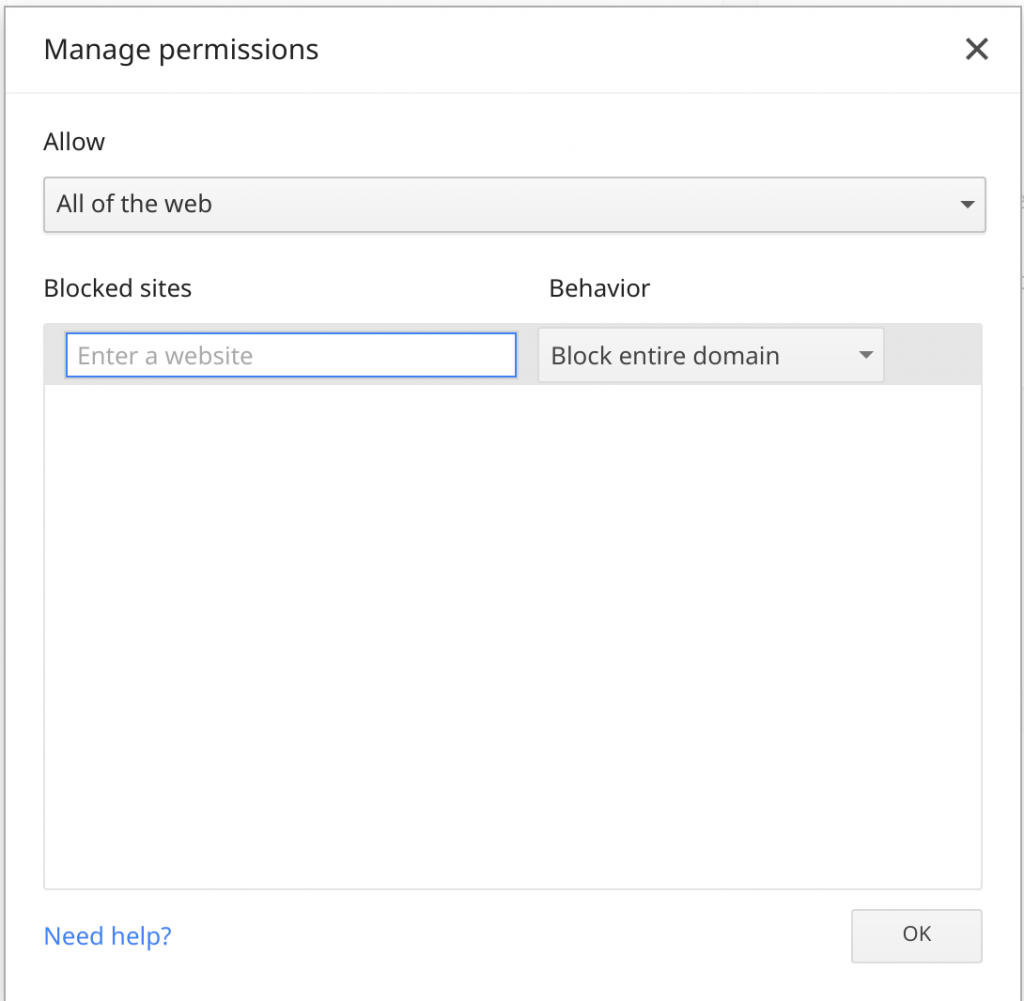
To manage the allowed/blocked list, click the “manage” link towards the top-right in the block labeled “permissions”:
On this screen, you can choose between allowing “All the web” and choosing certain websites to block, OR blocking the entire web and choosing certain websites to allow.
How to use Google’s Name Servers on your Chromebook.
Sometimes, you can experience strange network issues that can be solved by using Dynamic Name Servers other than your ISP’s default DNS. You can enter your own custom DNS Name Server IP, or, simply choose to use Google’s DNS. For a list of other DNS IPs, click here.
To change the DNS settings for your Chromebook, follow these simple steps:
- Navigate to “Settings”.
- Either click on the clock in the bottom right, and select “Settings” OR
- Type “chrome://settings” into the Omni bar (address bar, or URL bar) OR
- Click the 3 horizontal line menu button (hamburger button) in the top right of a Chrome window, and select “Settings”.
- Under “Internet Connection”, click on the “Wi-Fi Network” drop down menu, and click on your WiFi network
- Click the “Network” tab
- You will notice that “Automatic Nameservers” is already selected.
- Either choose “Google Nameservers” OR
- Choose “Custom Nameservers” and type in the IP of your preferred Name Servers
Somebody suggested that one of my extensions is causing my problem, how do I determine which extension is the culprit?
Steps 1-2 will tell us if we even have an extension problem. If we do, steps 3-14 will guide us through determining which extension is the problem.
- Sign out of your account.
- Click on the system tray, and click Sign Out
- Click Browse as Guest. In Guest Mode, you are not signed into Chrome, and have no extensions enabled, therefore if you cannot duplicate your issue, then it was an extension causing your issue, and you should continue with these steps. If your issue persists, you do NOT have an extension problem.
- Sign back into your main account
- Navigate to Settings
- Click on the system tray, and click Settings OR
- Type ‘chrome://settings’ into the omni bar and hit Enter
- Navigate to People
- Click on Advanced Sync Settings
- Select Choose What to Sync from the drop down.
- Uncheck Extensions
- Click OK
- Find and click on Advanced Settings
- Find and click on Reset Settings
- Click Reset. All of your extensions are now disabled.
- Navigate to Extensions
- Click on the system tray, and click Settings and click Extensions OR
- Type ‘chrome://extensions’ into the omni bar and hit Enter
- You’ll notice all your extensions are disabled (all boxes UNchecked, and everything greyed out). Re-enable your extensions one-by-one until your problem comes back. This will tell you which extension was causing your issues.
Now we’ll Perform a Browser Reset
Note: turning sync off makes sure that your chromebook doesn’t just re-add all the extensions after the browser reset is finished. We want to add them back one at a time to figure out which one is the bad one.
How do I know if I have a hardware issue, or a software issue?
Follow these steps to determine if you have a software issue, or a hardware issue
- Sign out, and sign into Guest Mode
- Click on the system tray, and click on Sign Out
- Click Browse as Guest. If your problem goes away, your problem is most likely an extension (software issue). To figure out which extension is the culprit, click here. If the problem persists, continue to the next step.
- Perform a Hard Reset
- For a Chromebox, or Chromebase, simply remove and reinsert the power cable
- For the Samsung Series 5, and Samsung Series 5 550, insert a pin into the tiny hole on the bottom of the device to press the reset button.
- For the CR-48, or the Acer C700 remove, and reinsert the battery
- For all other Chromebook models, press the Refresh + Power buttons
- If the problem persists, perform a Powerwash. this will wipe all local storage
- Navigate to Settings
- Click on the system tray, and then click Settings OR
- Type ‘chrome://settings’ into the omni bar, and press Enter
- Find and click Show Advanced Settings
- Find and click Powerwash
- If the problem persists, perform a USB restore. this will wipe all local storage
- First, why are you doing a USB restore?
- Because you see the “Chrome OS is missing or damaged” message? If so, proceed to the next step
- Don’t see this message, but still want to do a USB restore? You’ll need to do something in order to prompt the “Chrome OS is missing or damaged” message: (If you’re planning on using your Chromebook to create your restore image, don’t do this yet. If you’re planning to use a different device to create your image, you can go ahead and do this now.
- For the following devices, you’ll want to power your device off, find the recovery button press and hold the button, then power on the device while holding the recovery button.
- LG Chromebase
- Asus Chromebox
- Acer AC700
- CR-48
- Samsung Series 5
- Samsung Series 5 550
- Samsung Series 3 Chromebox
- For all other devices, Press Esc+Refresh then hold down the Power button while the unit is powered ON.
- For the following devices, you’ll want to power your device off, find the recovery button press and hold the button, then power on the device while holding the recovery button.
- Things you’ll need in order to create your recovery image:
- A computer, with admin rights (Chrome OS, Windows, Mac or Linux)
- An empty 4GB or larger USB flash drive, or SD card
- When recovering your Chromebook, make sure to create the recovery flash drive on the same model. For example, using an Acer AC700 WiFi recovery flash drive will not work on a Samsung Series 5 3G Chromebook.
- If using a Chrome OS device, Windows machine, or Mac:
- Open the Chromebook Recovery Utility Chrome app (download link)
- Click blue “Get Started” button
- Click link that says “Select a model from a list”
- Select your Manufacturer, and Product (ex. Acer: Acer C720P)
- Click blue “Continue” button
- Insert your USB/SD card into an open port on your Chromebook, and the tool will automatically detect the media.
- Use the dropdown menu to select the appropriate storage media.
- Click the Continue button.
- All of the data on the recovery media will be deleted if you continue.
- Make sure the media you’d like to use for your recovery is listed.
- Click the Create now button.
- If using a Linux machine:
- Download the recovery tool by clicking here.
- Modify the script permissions to allow execution with the following command: $ sudo chmod 755 linux_recovery.sh
- Run the script with root privileges with the following command: $ sudo bash linux_recovery.sh
- Follow the prompts from the tool to complete building the operating system image.
- Power off your Chromebook
- Insert your USB flash drive or SD card
- Power on your Chromebook
- Once the Chromebook finishes booting from the flash drive, follow the prompts.
- When prompted, remove the USB flash drive or SD card, and your Chromebook should automatically restart
How do I change the settings for my TouchPad?
- Navigate to Settings
- Click on the System Tray, and then click Settings OR
- Type ‘chrome://settings’ into the omni bar and press Enter
- Locate the section titled Device
- To adjust the sensativity of the TouchPad, adjust the TouchPad Speed
- For other TouchPad settings, click Touchpad Settings
- Samsung Series 3
- HP 11
- Samsung Chromebook 2 XE503C32-K01US
- Samsung Chromebook 2 XE503C12-K02US
- Acer Chromebook 13
- HP Chromebook 14-x050nr Touch (released at the end of 2014)
There are many ways to share files and music/movies/TV shows between your Chrome OS device, and your mobile phone. Many apps are designed to sync seamlessly between all your devices.
File Transfer:
There are two basic methods for transferring files between devices via a USB cable. One is called USB Mass Storage, and the other is called MTP (media transfer protocol). Chrome OS supports USB Mass Storage, so using things like external hard drives and USB thumb drives should work like you would expect, but Android does not support USB Mass Storage anymore.
Android uses MTP for file transfer. Chrome OS supports MTP file transfer via USB, but it only works in one direction, from the phone to the Chromebook. There are also several apps that allow file sharing between devices via the web.
AirDroid
AirDroid is a popular app that allows you to transfer files via the web to/from your Chromebook/Mobile device.
AirDroid is available for your Chromebook via the Chrome Web Store. Download
AirDroid is available for Android via the Play Store. Download
PushBullet
PushBullet is a popular app that allows you to transfer files via the web to/from your Chromebook/Mobile device.
PushBullet is available for your Chromebook via the Chrome Web Store. Download
PushBullet is available for Android via the Play Store. Download
PushBullet is available for iPhone/iPod/iPad via the Apple App Store. Download
Google Drive
Google Drive provides cloud storage, and web based apps for creating documents, spreadsheets and presentations. Files stored in Drive can be accessed from any device at anytime (assuming internet connection is available)
Google Drive is included on your Chromebook.
Google Drive is probably already included on your Android phone. If not, it is available via the Play Store. Download
Google Drive is available for iPhone/iPod/iPad via the Apple App Store. Download
Dropbox
DropBox is a popular app that provides cloud storage. Files stored in Dropbox can be accessed from any device at anytime (assuming internet connection is available)
Dropbox is available for your Chromebook via the Chrome Web Store. Download
Dropbox is available for Android via the Play Store. Download
Dropbox is available for iPhone/iPod/iPad via the Apple App Store. Download
Music:
Chromebooks support the following file types: .3gp, .avi, .mov, .mp4, .m4v, .m4a, .mp3, .mkv, .ogv, .ogm, .ogg, .oga, .webm, .wav. There are also several apps that sync between your Chromebook and mobile devices, allowing you to listen to music.
Pandora
Pandora is an app that allows you to play music based on a particular song, artist or genre. While you can’t choose specific songs/albums to listen to, it’s a great way to discover new music similar to music you already like.
Pandora is available for the Chromebook via the Chrome Web Store. Download
Pandora is available for Android in the Play Store. Download
Pandora is available for iPhone/iPod/iPad in the Apple App Store. Download
Spotify
Spotify is an app that allows you to stream songs and entire albums. They also offer a Pandora-like radio service.
Spotify is available for the Chromebook via the Chrome Web Store. Download
Spotify is available for Android via the Play Store. Download
Spotify is available for iPhone/iPod/iPad in the Apple App Store. Download
Google Play Music
Google Play Music is a full service music app, similar to iTunes. It’s different from iTunes, in that it’s completely web-based and does not require anything to be installed on your hard drive. Google Music allows you to purchase music, and also offers a premium streaming service, like Netflix but for music.
Google Play Music is available for Chromebook via the Chrome Web Store. Download
Google Play Music is available for Android via the Play Store. Download
Google Play Music is available for iPhone/iPod/iPad via the Apple App Store. Download
note: The following Chromebooks are powered by ARM processors, and are currently unable to upload music to Google Music via the Chrome app. (ARM users can still purchase music from Google Music, they just can’t upload MP3s from their device to their account):
Movies:
Chromebooks support the following file types: .3gp, .avi, .mov, .mp4, .m4v, .m4a, .mp3, .mkv, .ogv, .ogm, .ogg, .oga, .webm, .wav. There are also several apps that sync between your Chromebook and mobile devices, allowing you to watch movies/TV shows.
Google Play Movies
Gogole Play Movies allows you to purchase movies and TV shows, which can be streamed from the cloud, or downloaded to your device and viewed offline.
Google Play Movies is available for your Chromebook via the Chrome Web Store. Download
Google Play Movies is probably already installed on your Android device, and is available via the Play Store if it’s not there already. Download
Google Play Movies is available for iPhone/iPod/iPad via the Apple App Store. Download
Netflix
Netflix is a premium online movie and TV show streaming service.
Netflix is available for your Chromebook via the Chrome Web Store. Download
Netflix is available for Android via the Play Store. Download
Netflix is available for iPhone/iPod/iPad via the Apple App Store. Download